


The Microsoft Power Automate service allows you to create automated workflows between apps and services. In this article, we will discuss how to create an automated flow from scratch to read emails using Power Automate.
Over the years, industries have been established that use email as their primary source of communication, storage, tracking, or processing mechanism and mostly they relied upon a combination of manual activities to process these messages, deciding whether the content met certain criteria and then performing an action. For example, consider a scenario where you receive daily emails from a vendor containing reports which need to be processed and delivered on time, so in this case, a workflow that notifies the user about receiving new emails without any failure is a good way to automate using Microsoft Power Automate.
Microsoft Power Automate is a powerful email automation tool that can help you create and send customized emails with ease. You can use this software to create email campaigns, send automated emails, and track your email marketing performance.
Now, let's get started:
In this example, we’re going to look at some of the filtering and selection options available when processing an incoming message.
To work with this flow, you will need an Exchange Online mailbox, a Slack account ( Slack is a workplace communication tool, “a single place for messaging, tools and files.”) and a Microsoft Power Automate subscription. If you have already signed up for a Microsoft 365 trial, you have everything to proceed!
For this scenario, we’re just going to go through a few steps to see how we can use filtering parameters to identify messages that could be related to 'Financial Details' and to collect information like the sender's email address.
Follow the below steps, to begin creating our workflow:
The first step is to log into the Power Automate web portal ( https://make.powerautomate.com/ ) and click Create.
From the Start from blank menu, select 'Automated cloud flow'.

Give a name for your flow, and then search for the triggers 'When a new email arrives (V3)'
Select 'When a new email arrives (V3)' from choose your flow's trigger.
Click on Create.

By default, the flow is going to connect to the Outlook mailbox for the currently logged-in account.

Click on 'Show advanced options' to expand the dropdown.
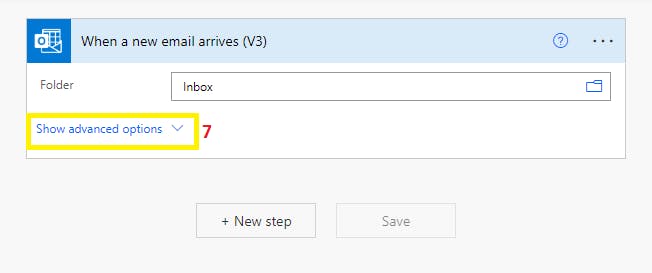
In the Subject Filter box, enter a text value such as 'Financial Details'. This will ensure that the flow only performs actions on specific emails:

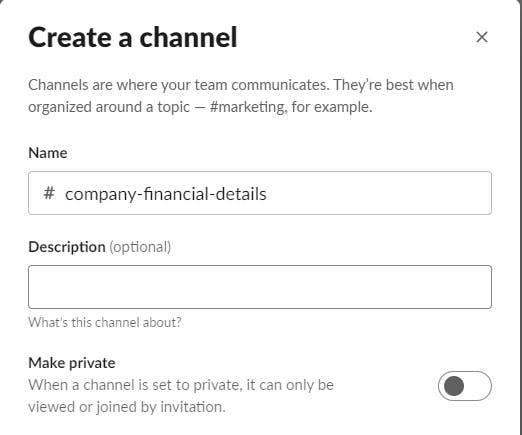
After applying a subject filter, the next step is to add another connector to display the sender's address of the email in the Slack account. So the next step is to go to your Slack Workspace and create a new channel named 'company-financial-details'.
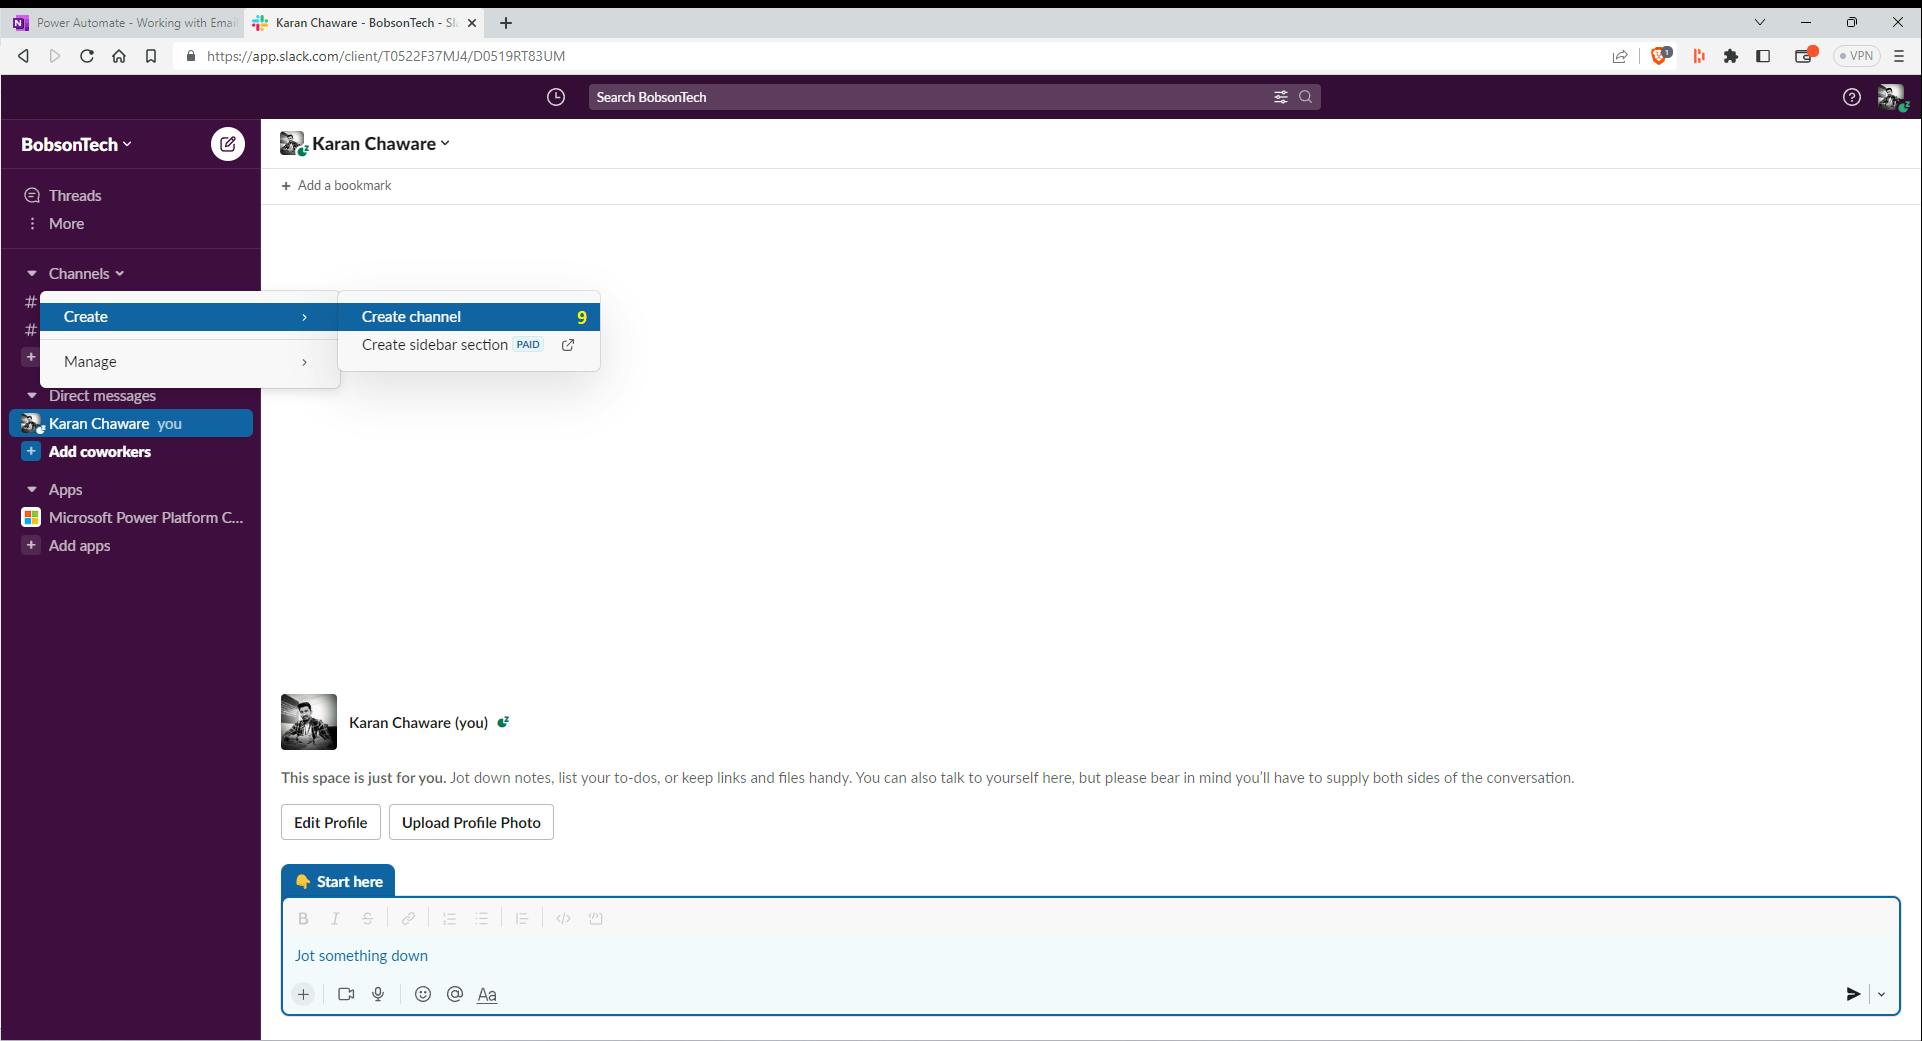
Once the channel is created, it will be displayed on the left side of the menu under the 'Channels' section.

Go back to the power automate website and click on the New Step button to add another action.
Now search for the 'Slack' action and select 'Post message (V2)'.

Select the channel name which we created earlier for the 'Slack' account from the option available for Channel Name.

After selecting the channel, select 'From' from the dynamic content window as Message Text.

That's all, our flow is ready to capture the sender's email address of new emails with the subject line as 'Financial Details'. Now save our flow by clicking on the Save button before we test it.
Select 'Manual Flow' and click on the Test button to send the email manually to your inbox to trigger the flow.
Once the flow is successfully executed, you can check the 'Slack' account for the new comment mentioning the sender's email address.

As you saw in the example, you can very quickly narrow down the emails that the flow would act upon. Also 'When a new email arrives (V3)' trigger has several configurable options, including which folder to check for new mail, sender or recipient selections, importance or priority flags, and attachment settings.
Conclusion:
In this article, we have covered how to read emails in Power Automate using outlook and slack connectors.
Hopefully, this article has clearly shown you how to automate email workflow using Power Automate and the different options available within Power Automate’s email functionality.