


In addition, to monitor your inbox for processing emails, many use-cases require the ability to automatically save and process the attachments that are received with an email which is time-consuming and requires a lot of manual effort.
This blog will help you to work with Power Automate to process the email and save the attachment to OneDrive, or further act upon them with other connectors, actions, or manual intervention.
In this example, we are going to create a sample flow that does the following:
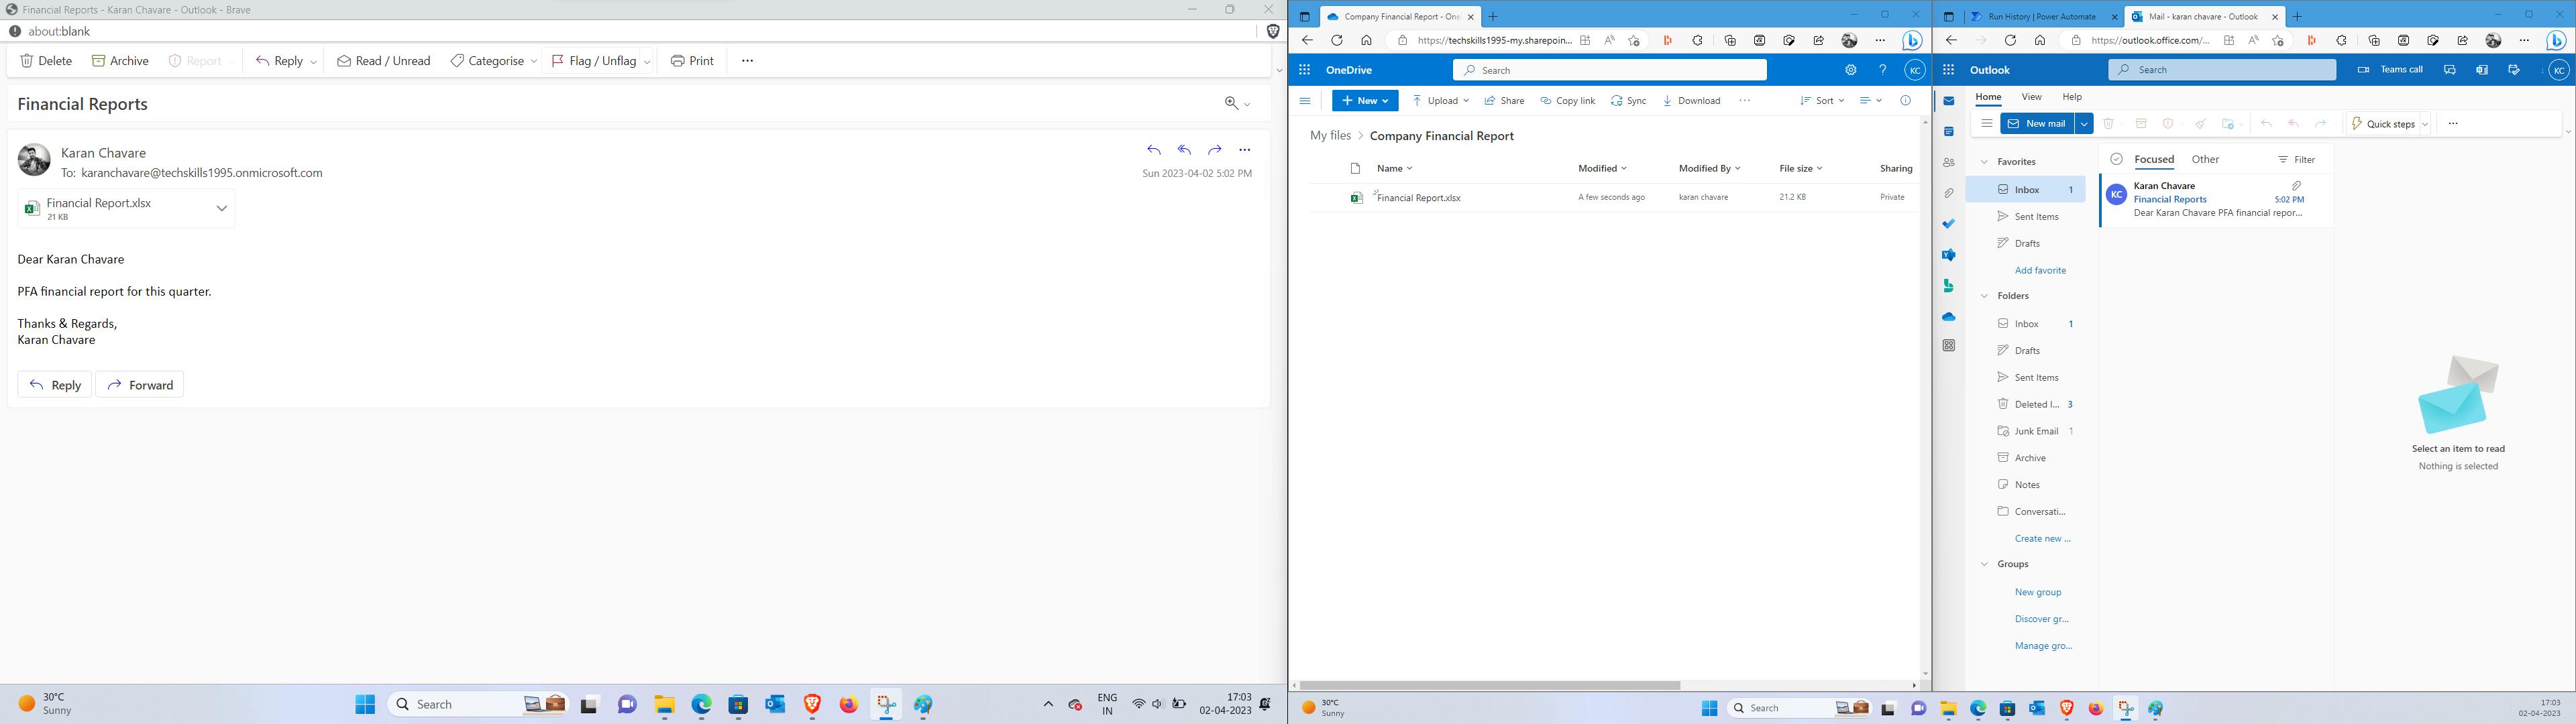
Monitors inbox for emails that contain a subject line as 'Financial Reports'.
Save the attachment to OneDrive within the folder called 'Company Financial Report'.
Creating the flow:
To complete this example, follow these steps:
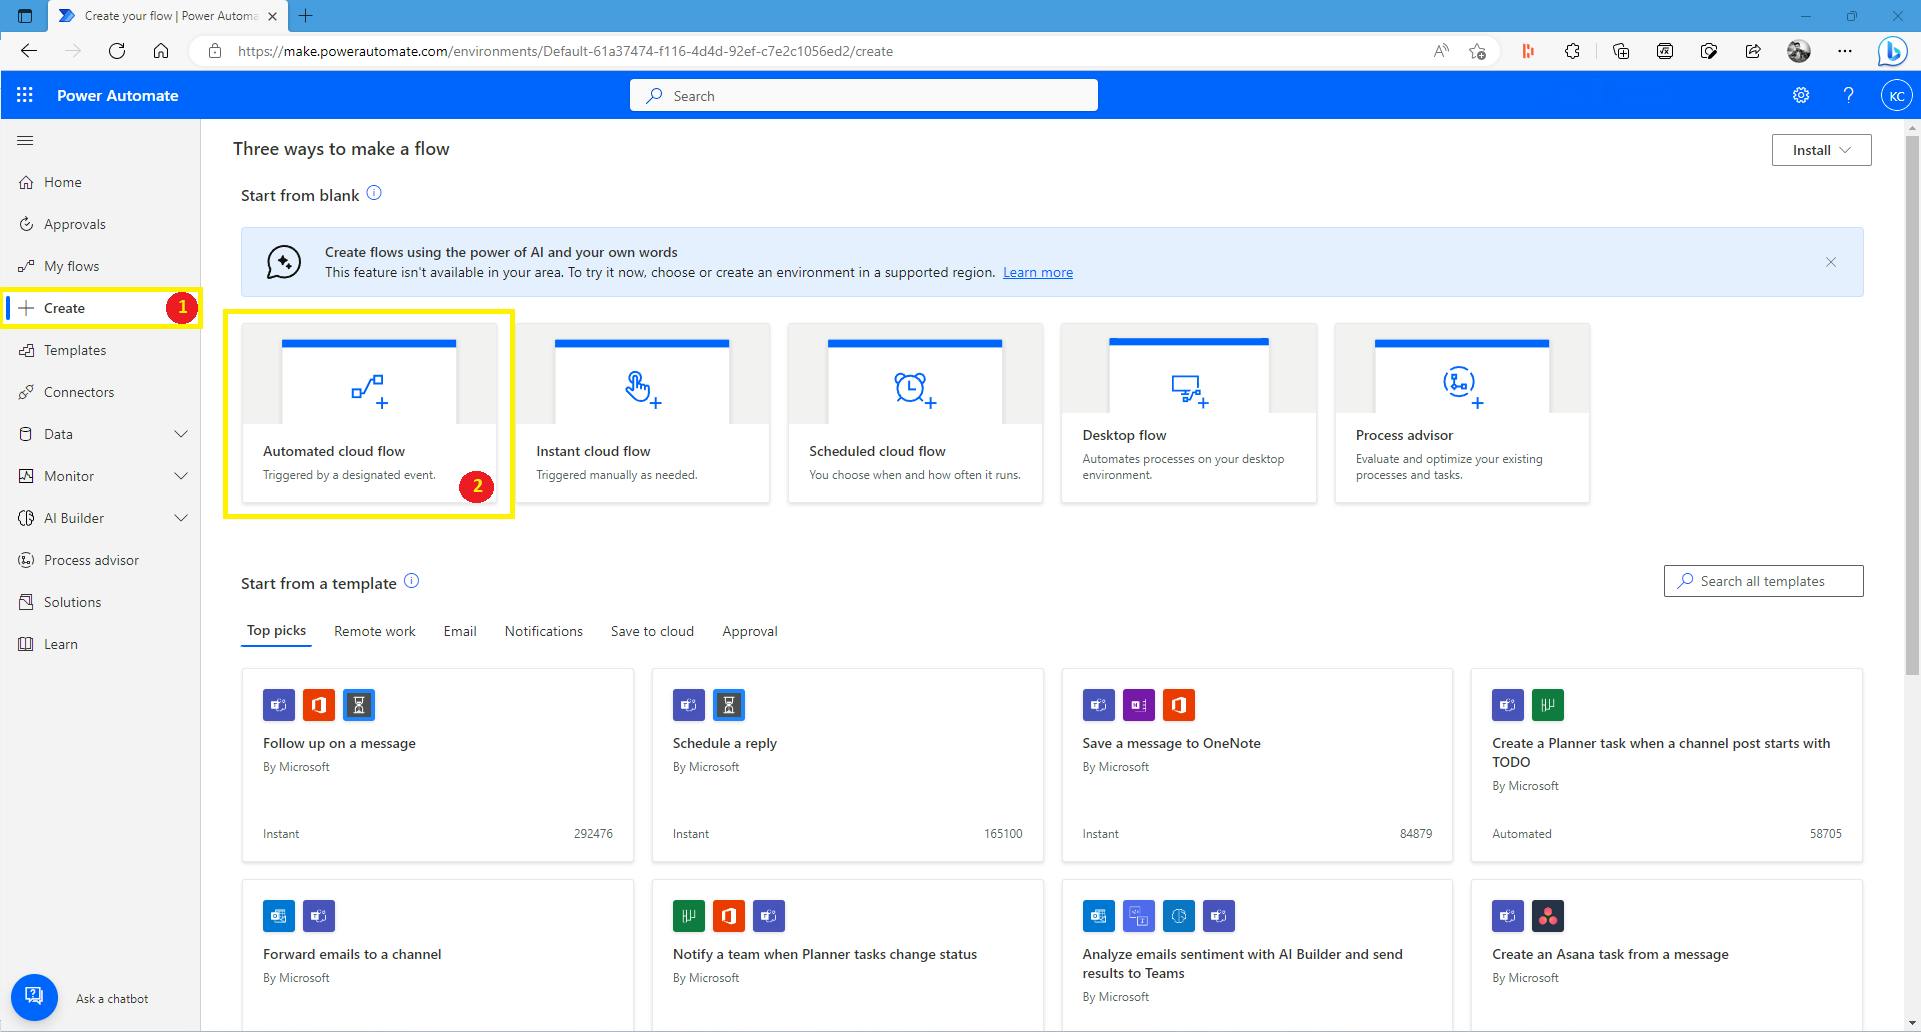
The first step is to log into the Power Automate web portal ( https://make.powerautomate.com/ ), and click Create.
From the Start from blank menu, select 'Automated cloud flow'
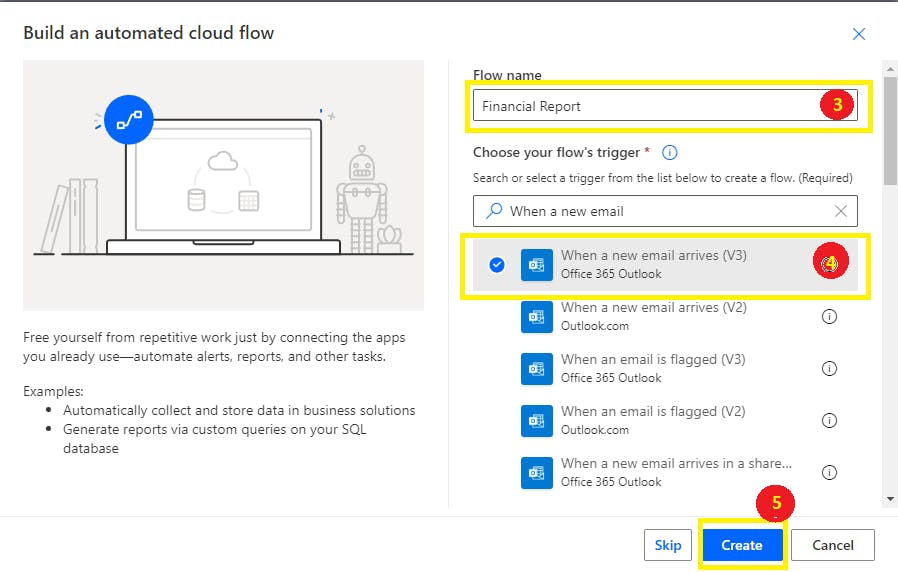
Give a name for your flow, and then search for the triggers 'When a new email arrives (V3)'
Select 'When a new email arrives (V3)' from choose your flow's trigger.
Click on Create.
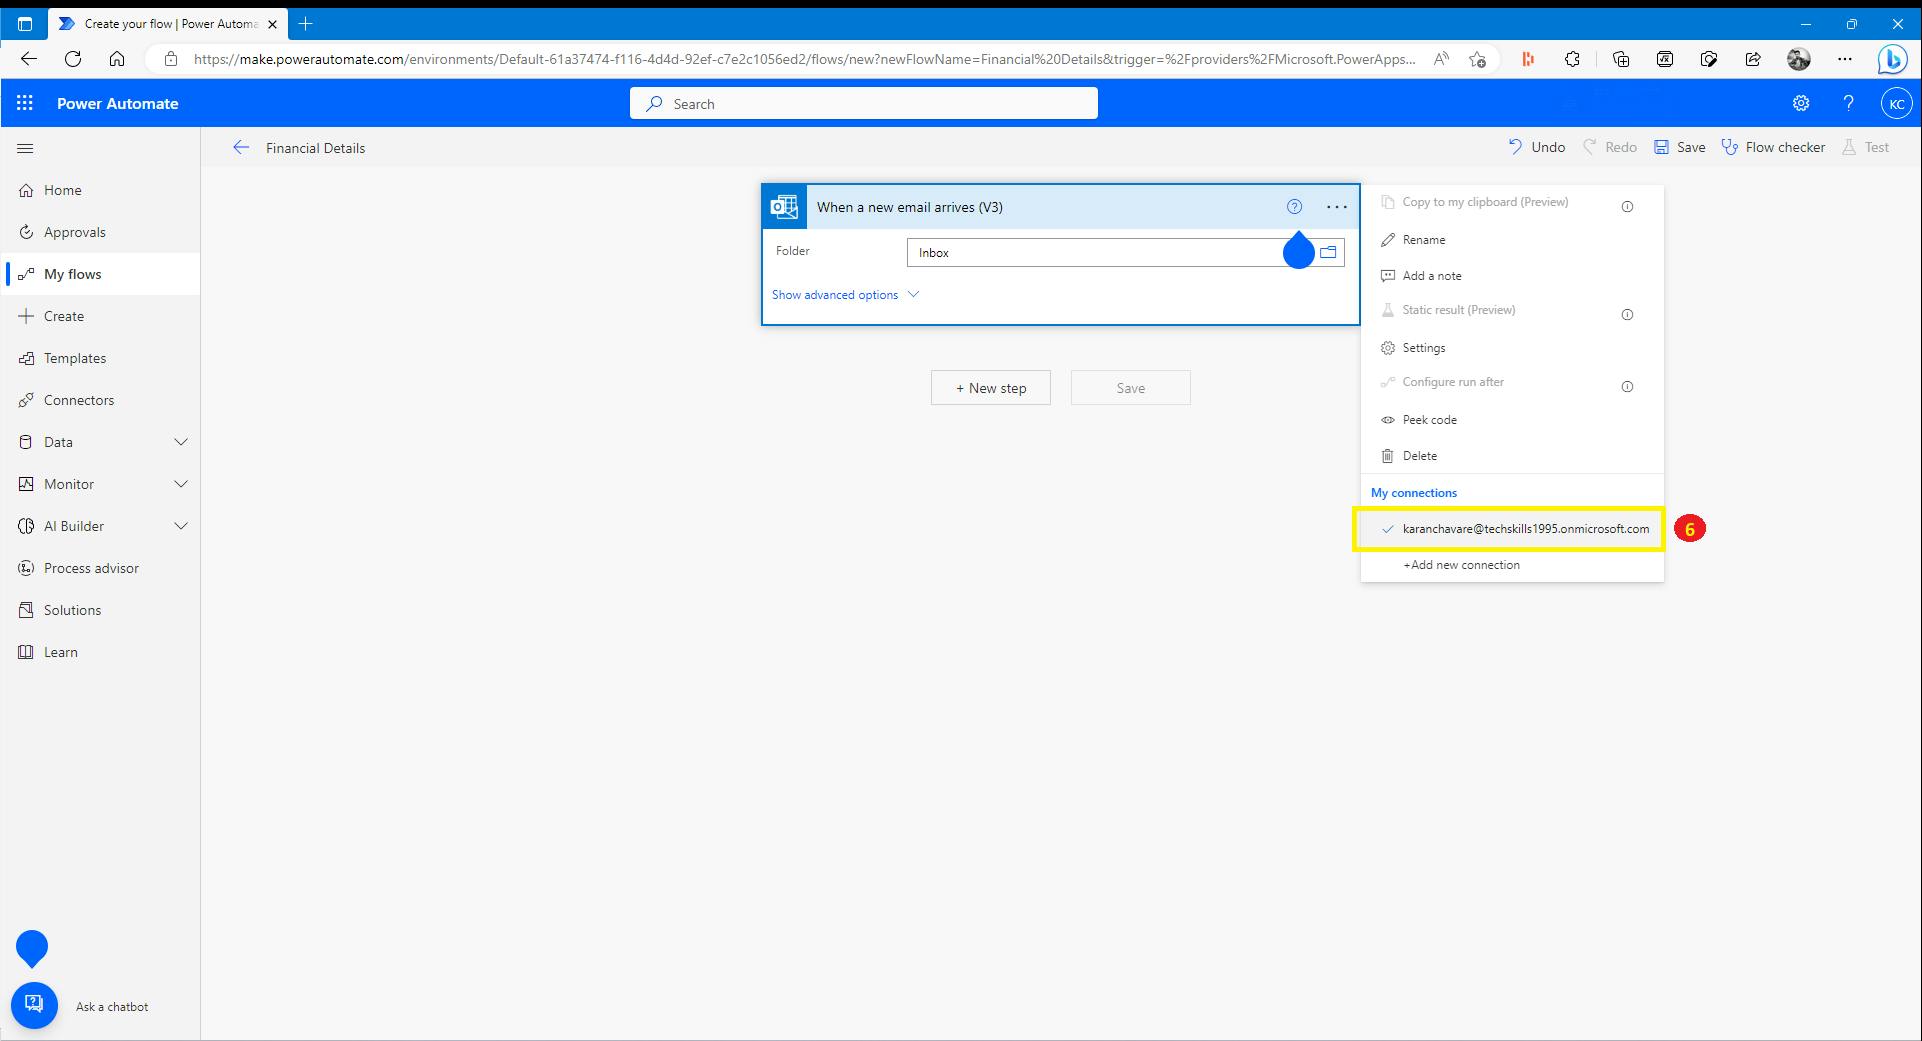
By default, the flow is going to connect to the Outlook mailbox for the currently logged-in account.
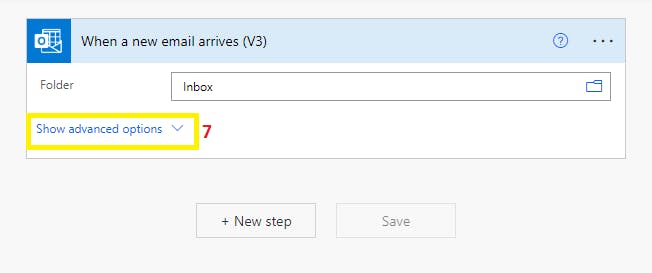
Click on 'Show advanced options' to expand the options.
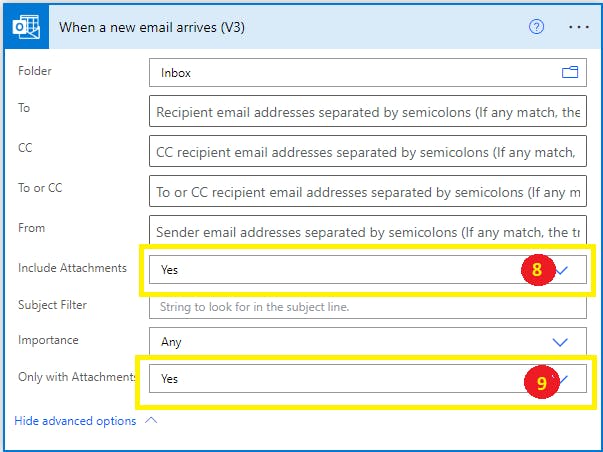
In the Only with Attachment box, select 'Yes'. This will only look for the email which has attachments.
Also, Select 'Yes' for the Include Attachments box which makes the attachment content available later in the flow.
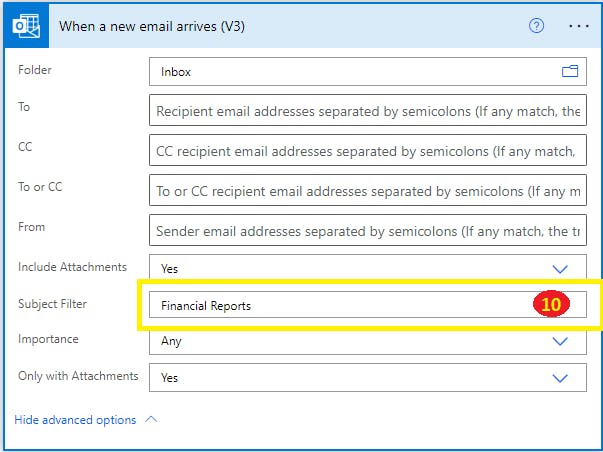
In the Subject Filter box, enter a text value such as 'Financial Reports'. This will place a further constraint on the rule to only work if all three of the conditions are met.
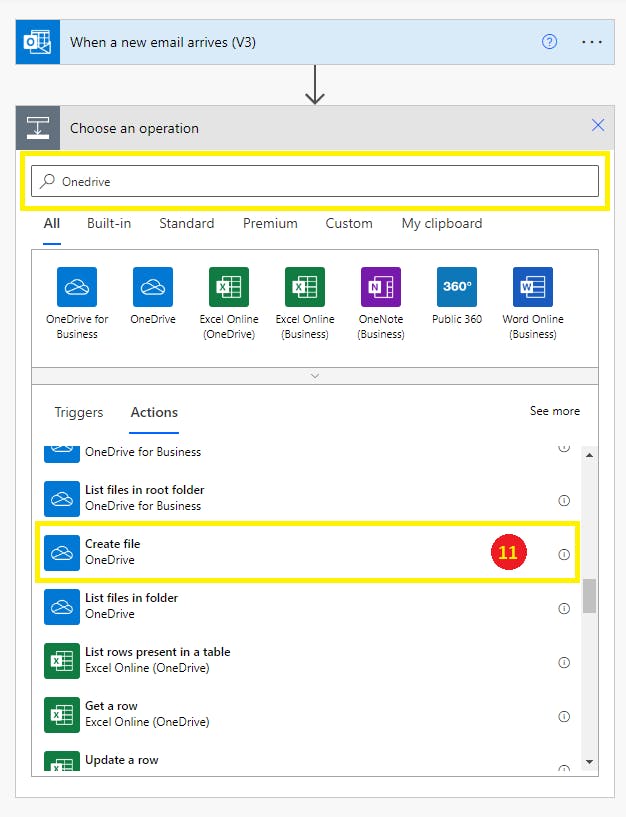
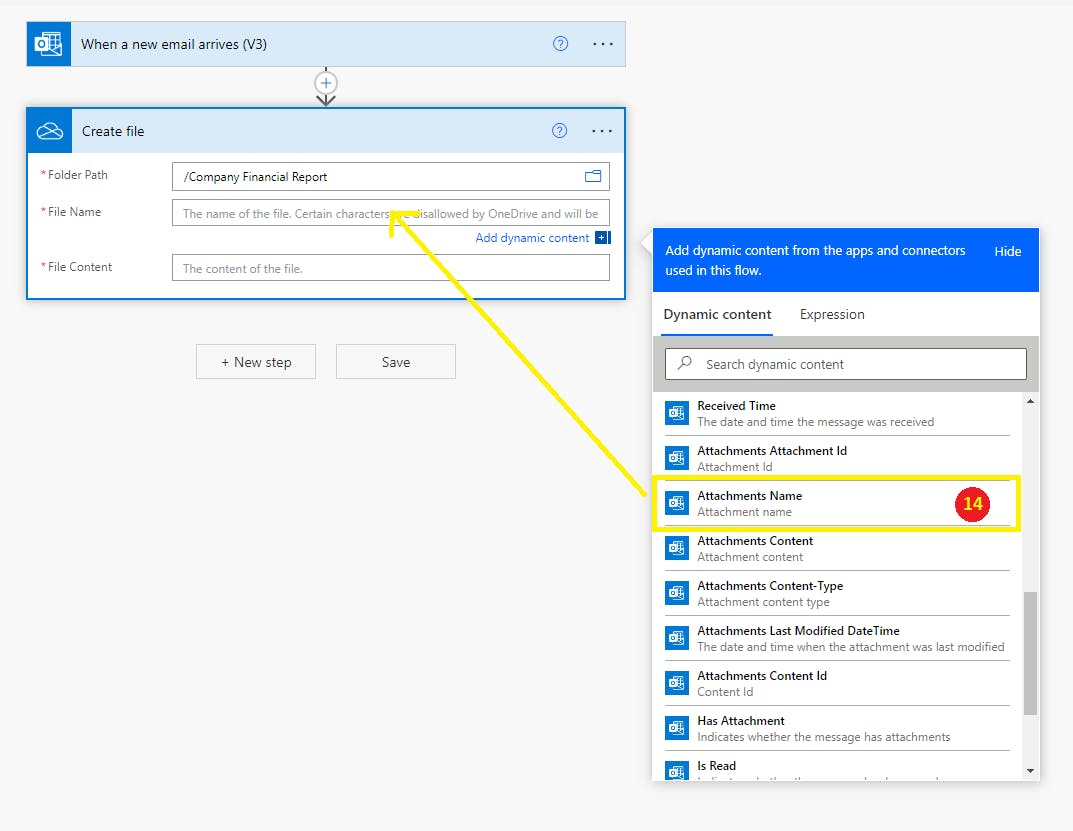
After applying a subject filter, click on the 'New Step' button to add another action. Now search for the 'OneDrive' connector and select 'Create File'.
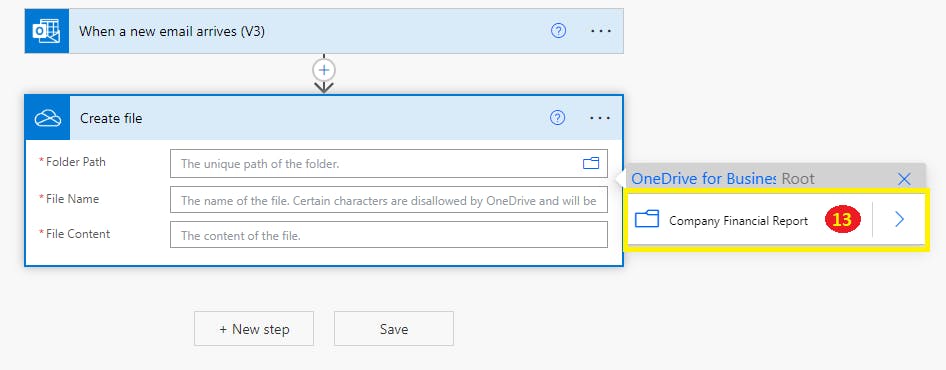
Select the folder path where you wish to save the attachment. For this example, I've created a folder with the name 'Company Financial Report'.
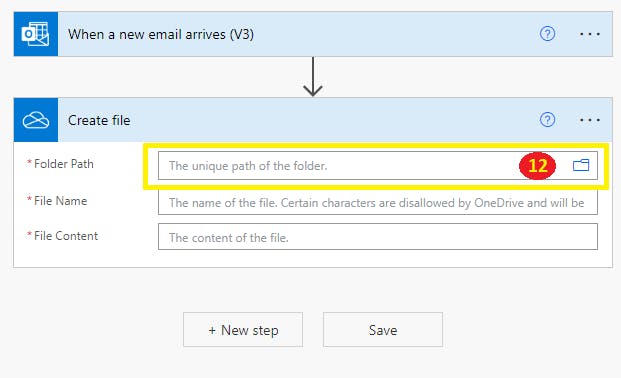
Now, to select the folder path, click on the folder picker icon and select the appropriate folder.
Next, set the File Name field to 'Attachments Name' from the dynamic content window.
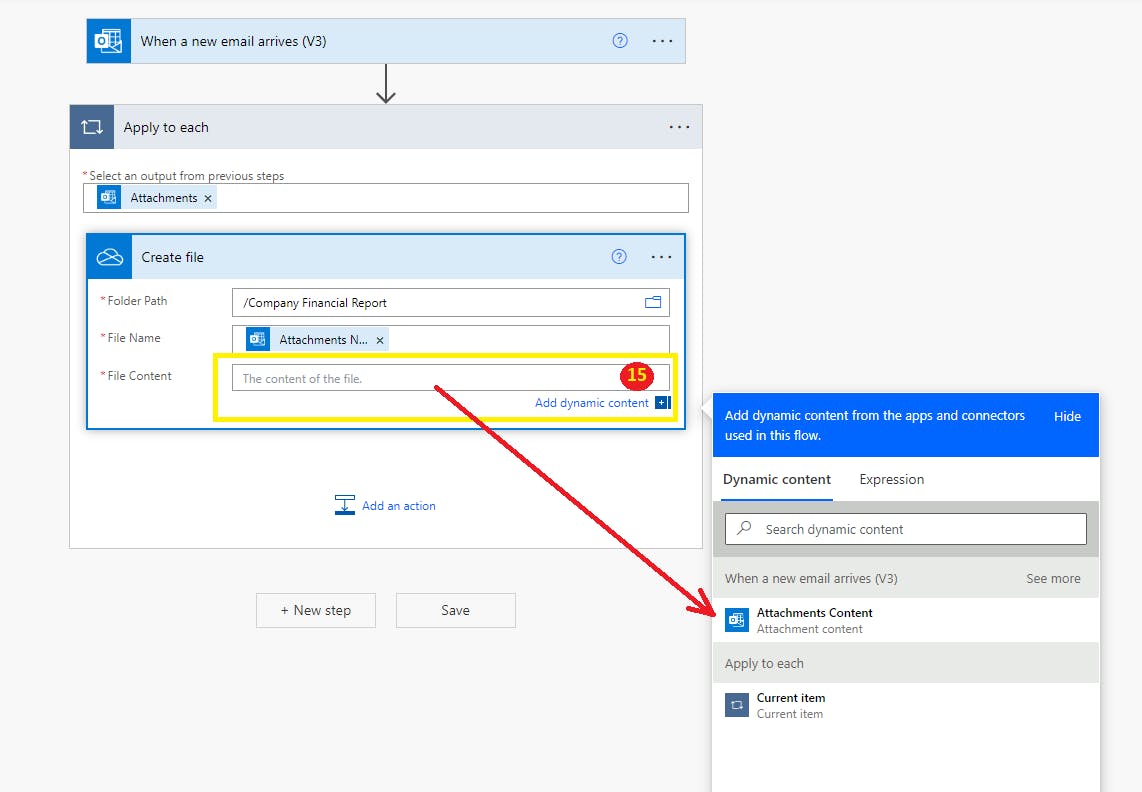
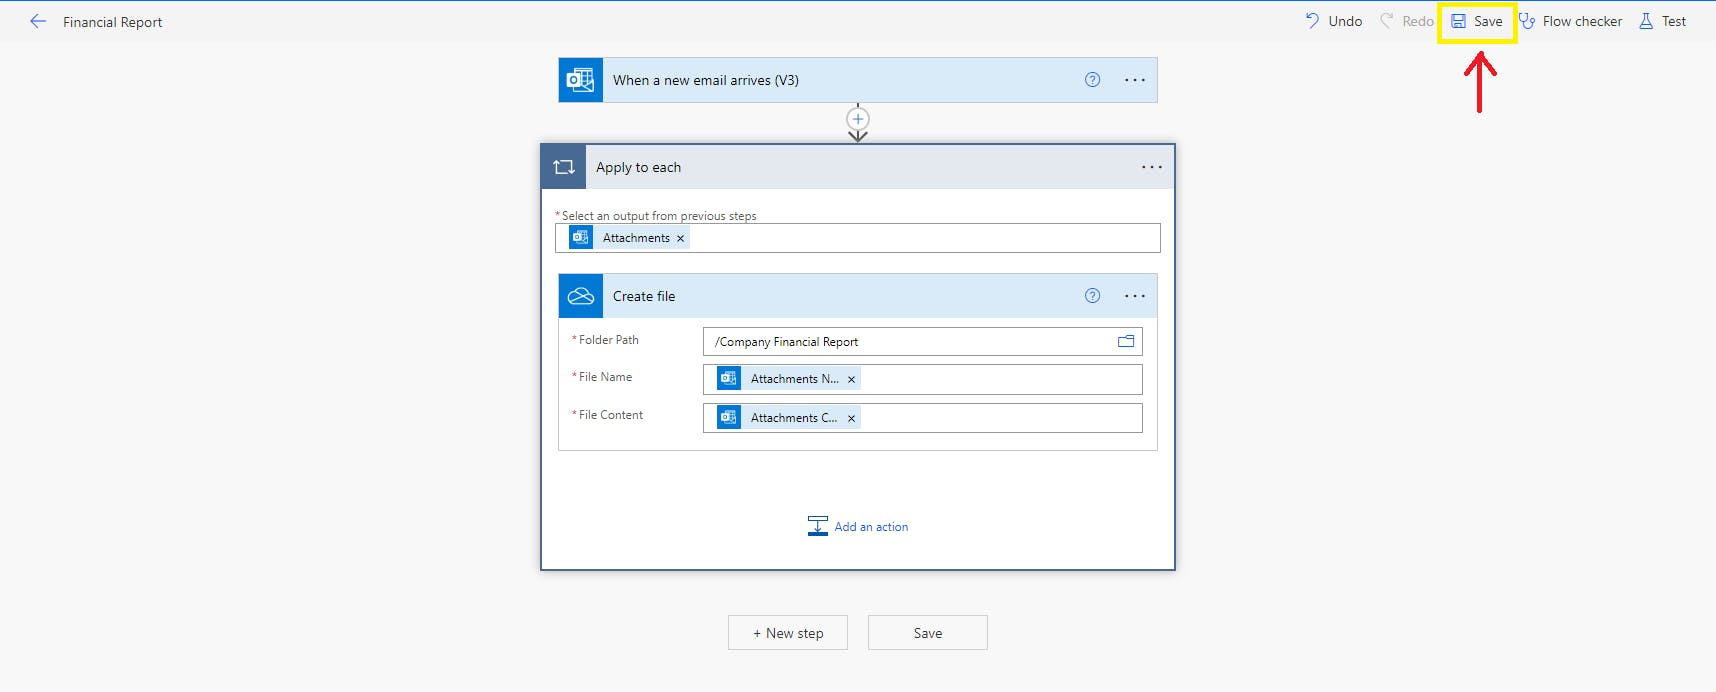
Next, set the File Content to 'Attachment Content' and click on the Save button to save our flow.
Now to test your flow, click on the 'Test' button then select 'Manual Flow' to send the email manually to your inbox to trigger the flow.
Once the flow is successfully executed, you will be able to see that the attachment got saved in the OneDrive folder.
Conclusion:
That's how it's easy to can create a workflow in Microsoft Power Automate to process emails & save multiple attachments within an email, which can save the time of the user/businesses.