


This article will give an in-depth introduction to creating a simple flow that monitors Twitter for a certain hashtag and then posts a notification to a team’s channel. Such flow can be used for capturing customer sentiment for a product or service, monitoring engagement activity etc.
Understanding the component required for flow:
Active Twitter account (Username & Password)
A trigger in Power Automate monitors Twitter for certain words or phrases.
Office 365 account (username and password)
Microsoft Team Channel
An Action that posts to Microsoft Teams
Creating and executing the flow:
Once we have the prerequisite components for the flow, we can start configuring our flow. Following are the steps for creating this sample flow:
Log in to the Power Automate web interface (https://make.powerautomate.com)
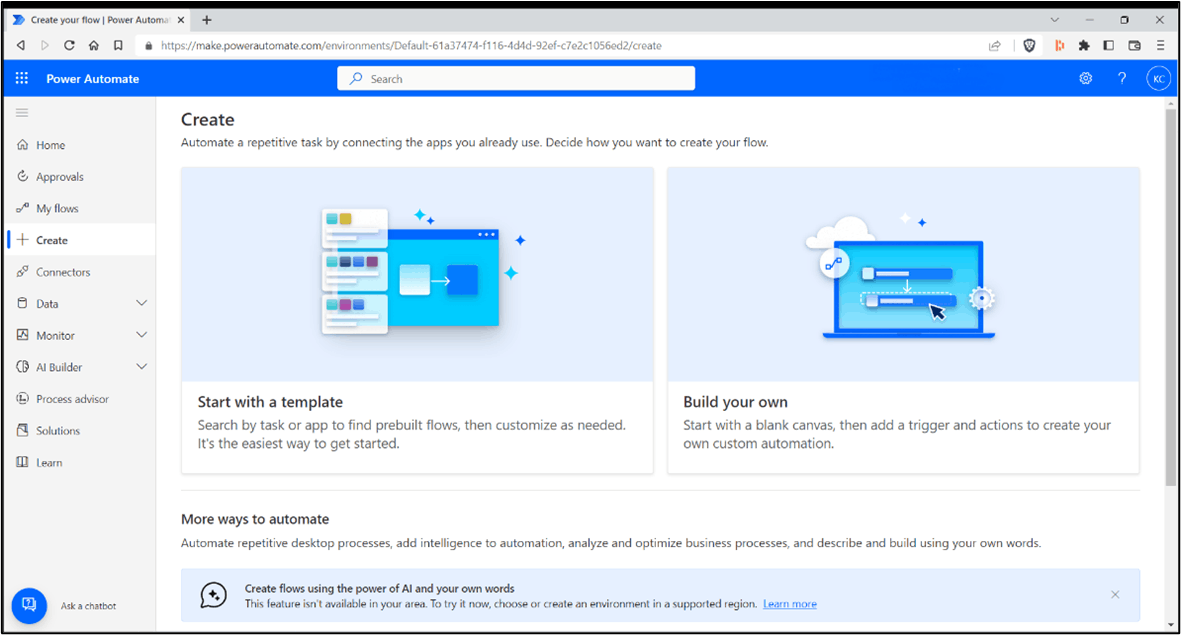
Click on the Create option in the navigation bar.
Under the Create section click on Build your own:
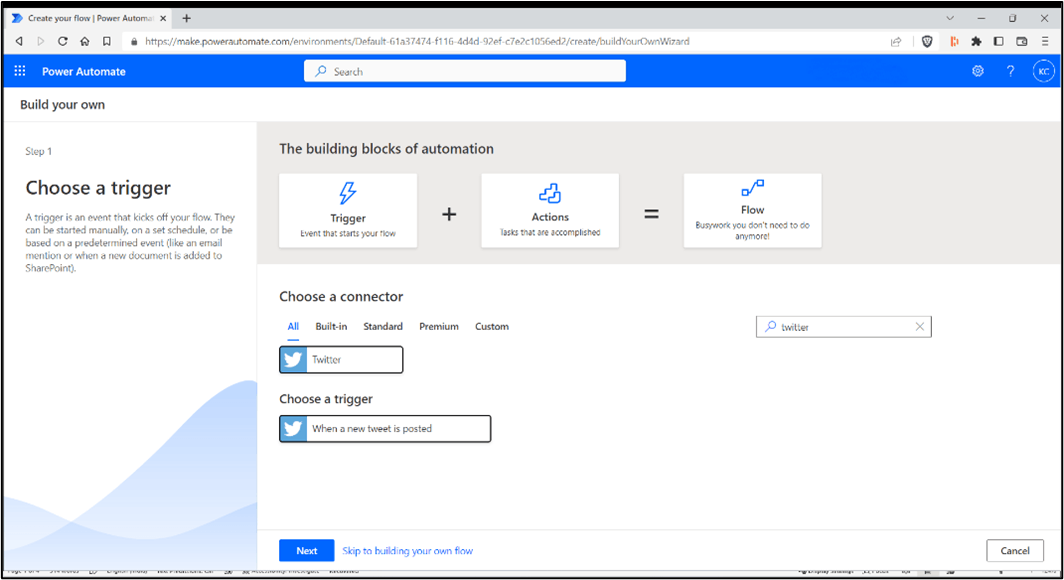
Once you are on Build your own page, first thing is to choose a trigger.
In this use case, we will use Twitter as our trigger.
In the Choose a connector search for Twitter to get related triggers for Twitter. Select when a new tweet is posted and click Next.
Once you click on Next, in step 2 you must choose the action.
Under Choose a connector we will search for Teams-related actions.
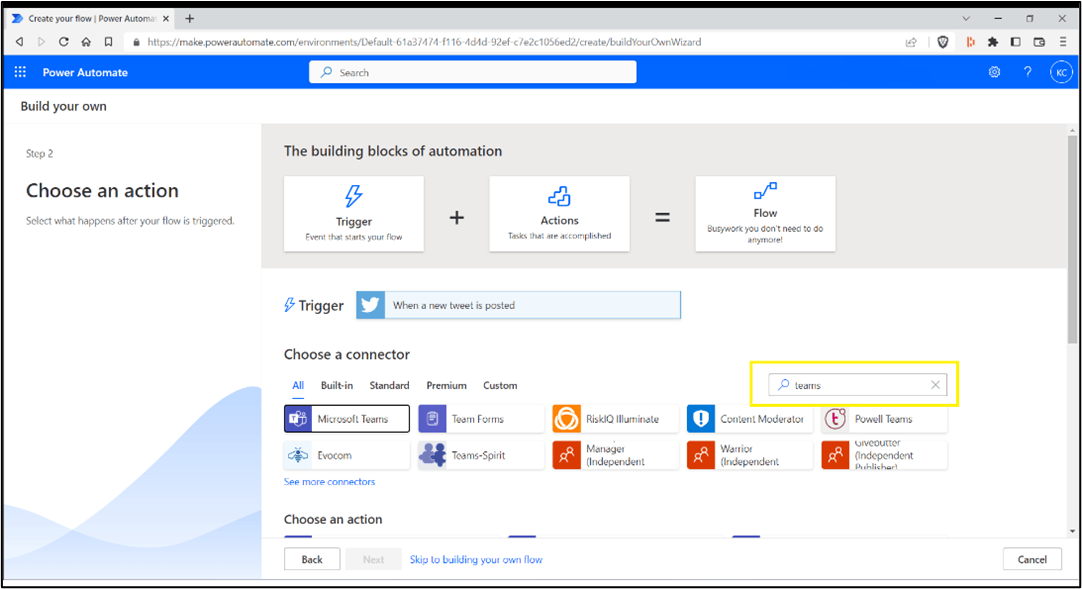
Select Microsoft Teams in the connector section and you can see several actions for Microsoft Teams under Choose an action section. From the list of actions select Post message in a chat or channel, since we want to post the tweet to our teams or teams channel and click on Next.

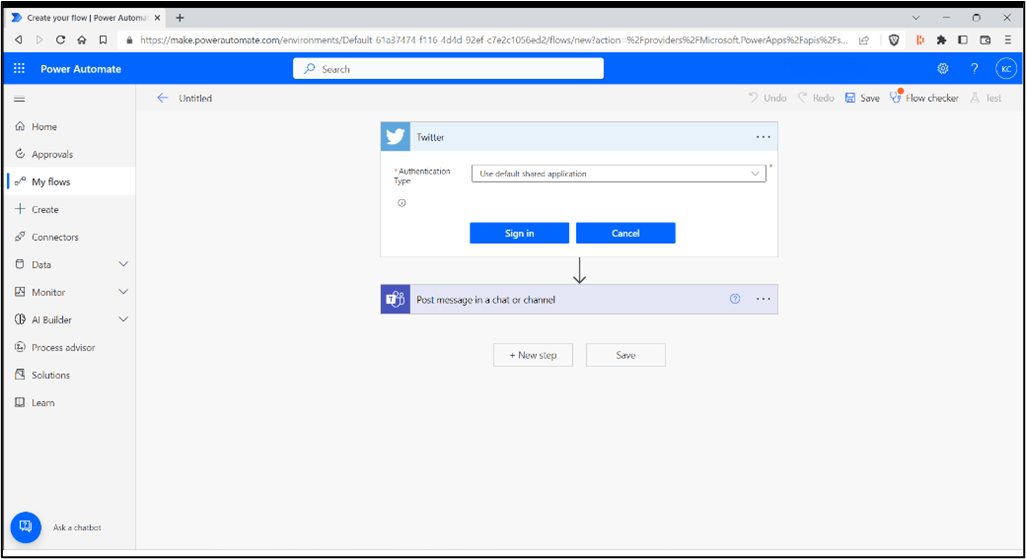
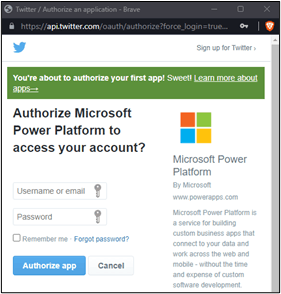
Next, click Sign in to provide the necessary Twitter credentials to access the Twitter API. You can use the Use default shared application authentication type for this basic flow:
Enter the credentials of a Twitter account and then select Authorize app:
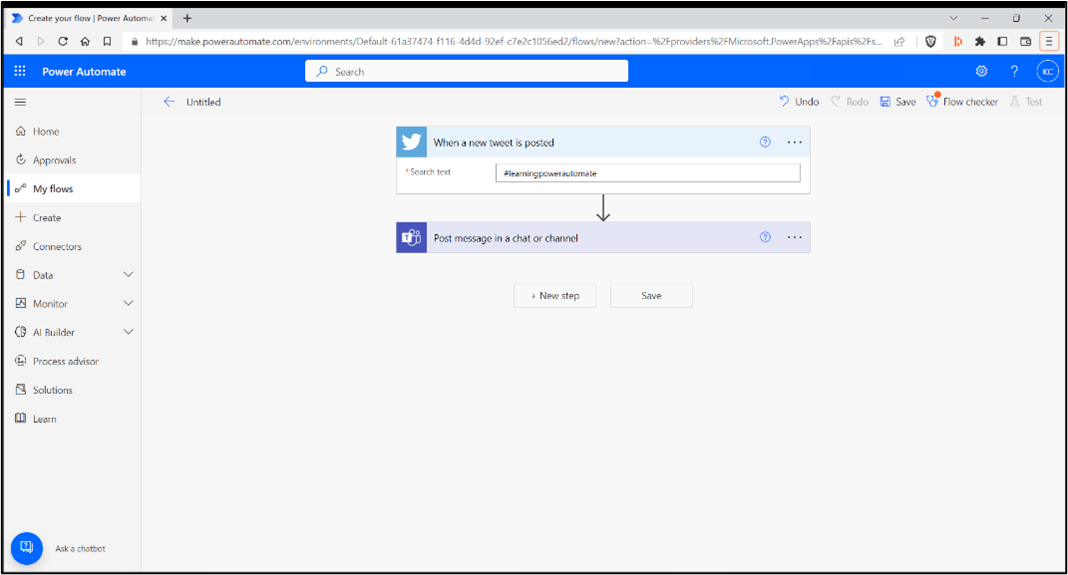
After authorizing the app, in the Search text box, enter the text that you want to search for. In this case, the flow will be configured to monitor new instances of #learningpowerautomate:
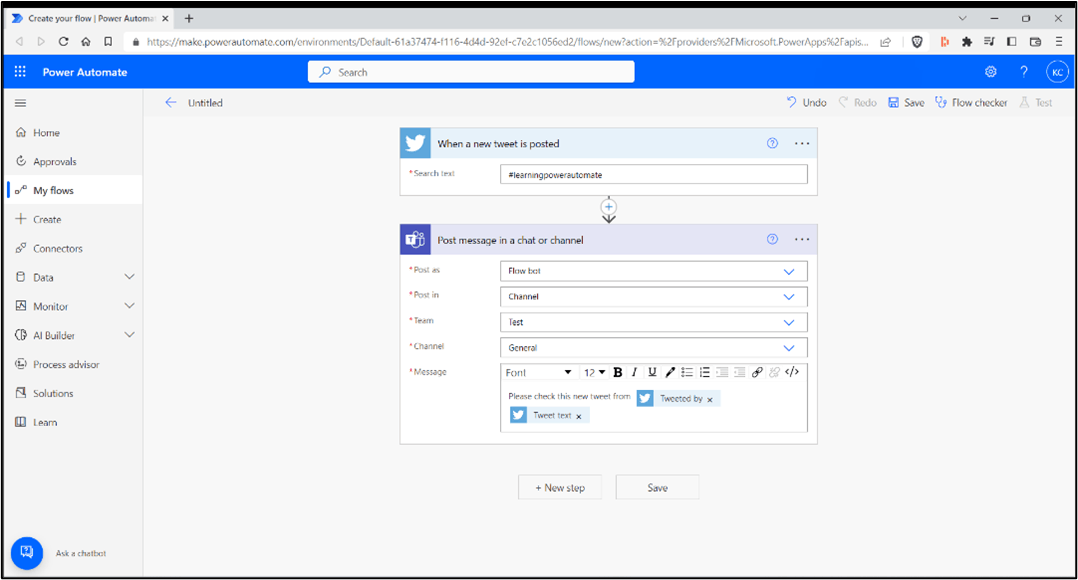
After that in the Microsoft Teams actions under Post as, select Flow bot.
Under Post in, select Channel. This will allow you to select a team and a channel to post the message.
Populate the Message field. In this example, the dynamic content values Tweeted by, and Tweet text have been selected to surface data provided by Twitter:
Scroll to the bottom of the page and select Save.
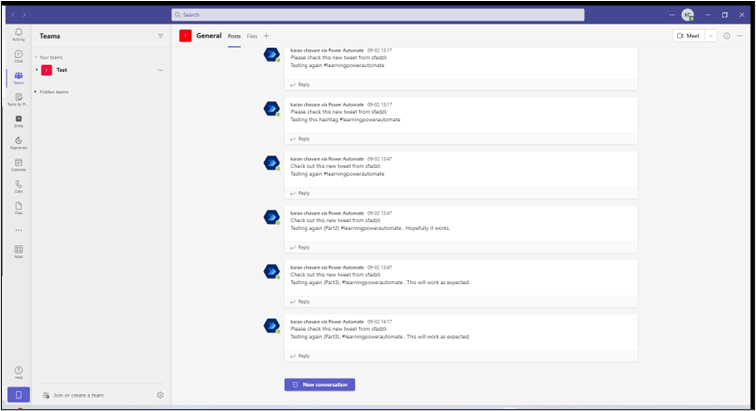
Now that the flow has been created and saved, you can test it by clicking on the Test button generating content manually on the Twitter page and then checking to see whether the content gets posted to the Microsoft Teams channel as you’d expect:
So, this is how we can create a flow by using triggers and actions in Power Automate which can help organizations stay connected and generate actionable information in a relatable manner.
"Happy Automation"